🟢 How to connect a WhatsApp account via Meta’s Official Cloud API
📚 In this article you will learn how to connect a WhatsApp account to the app using Meta’s Official API.
Meta’s Official Cloud API requires a Facebook Business Account and a phone number you do not wish to use for any other purpose. Once connected to the cloud, you’ll be unable to open it normally in WhatsApp, and will be obligated to use our Live Chat to see and manage your conversations.
One you have them, here are the steps to do it:
Create an app
Open a new window and go to developers.facebook.com. Sign-up, then return to the same link and click on “My apps”.

Click on “Create app”.

Select Other in the first modal form.

A page called Create an App will appear with a list of app types. Select Business. Then click on the next button.

In the Details section, add a display name for your app and provide a contact email address. Optionally, you can select a Business account to connect it to. Click on “Create app”. A pop-up form will appear. Re-enter your Facebook password and click on the submit button.

Add a phone number
A new page will open asking you to add products to your app. Click on ‘WhatsApp’.

Select a business portfolio. If you had already added a commercial account, it will be automatically selected.

The Quick Start page will open. You will see a welcome message at the top. Click on the ‘Get started using the API’ button.

You will be redirected to the Quick Start > API Configuration page. Scroll down. You will find a list of steps. Go directly to Step 5: Add a phone number. Skip the rest. Click on the ‘Add phone number’ button.

In the modal form, choose a name to show in your WhatApp’s profile. Add a timezone, indicate your business’ category and, optionally, write a description. Tap in Next.

Add the phone number making sure to state the country code correctly. Verify it either by SMS or phone call, and click on “Next”.
💡 PRO TIP: If you want to use a phone number that is already on a conventional WhatsApp account, follow this guide to migrate it.


Add a payment method
Go all the way down to Step 6: Add a Payment Method. Remember that starting from February 1st, 2022, Facebook has globally implemented a new pricing model for WhatsApp messages. With this new structure, WhatsApp Business Accounts are charged per conversation depending on who initiates it: you (business-initiated) or your customer (contact-initiated). Under this pricing model, you receive free benefits including Message Templates within a 24-hour messaging window and 1000 monthly conversations. Click on Add a payment method.

A new page called Settings of the Company will open. It is inside the Business Meta Account you linked to your app in the steps before. You will be automatically directed to the WhatsApp section of this page. Go to the Settings tab and click on the Payment settings button.

On the next page, click on Add Payment method. Add your credit or debit card information and save.

Collect the access token
Now you have to collect a permanent access token to connect your bot. To obtain it, you need to set-up a new user. Go back to the Settings of the company page inside your Meta Business Account. In the left menu, click on Users > System Users. Click on Add.

In the modal form, write a username and choose Admin as the user’s role. Then, click on accept, and finally, on done.

Select the user you just created, and tap on Add assets.

In the modal form, open the Apps section on the left menu, select the app you previously created, turn on the Full Control Permission and Save.

Now you have to generate an access token. Click on the Generate new token button.

Select the app. On the permissions window, select Never for the token’s expiration date.

Then, turn on the following permissions: Business management, WhatsApp Business messaging and WhatsApp business management.


Generate the token. Copy it, paste it as text in another document and save it. It will no be stored on Facebook, and you will need it later in this and other processes. Then go to “WhatsApp account” in the left sidebar, choose the account you created for your bot, copy the ID and save it too.

Open our app in another tab. Login and go to WhatsApp > Add Account. In the Add WhatsApp profiles page, you will find the URL and the token webhooks. Keep this open. We will need them.

Configure the webhooks
Go back to the Quick Start > API Configuration page in Meta Developers and click the link on Step 3 to configure the webhooks.

In the Configuration page, tap on edit.

A pop-up window will appear. Copy the URL webhook from our app and paste it in the first box. Then, do the same with the token webhook in the second. Save.

Now you have to select the webhook fields. To do it, click on the Manage button and subscribe to messages. Finally, click on Done to save.


Turn on the app
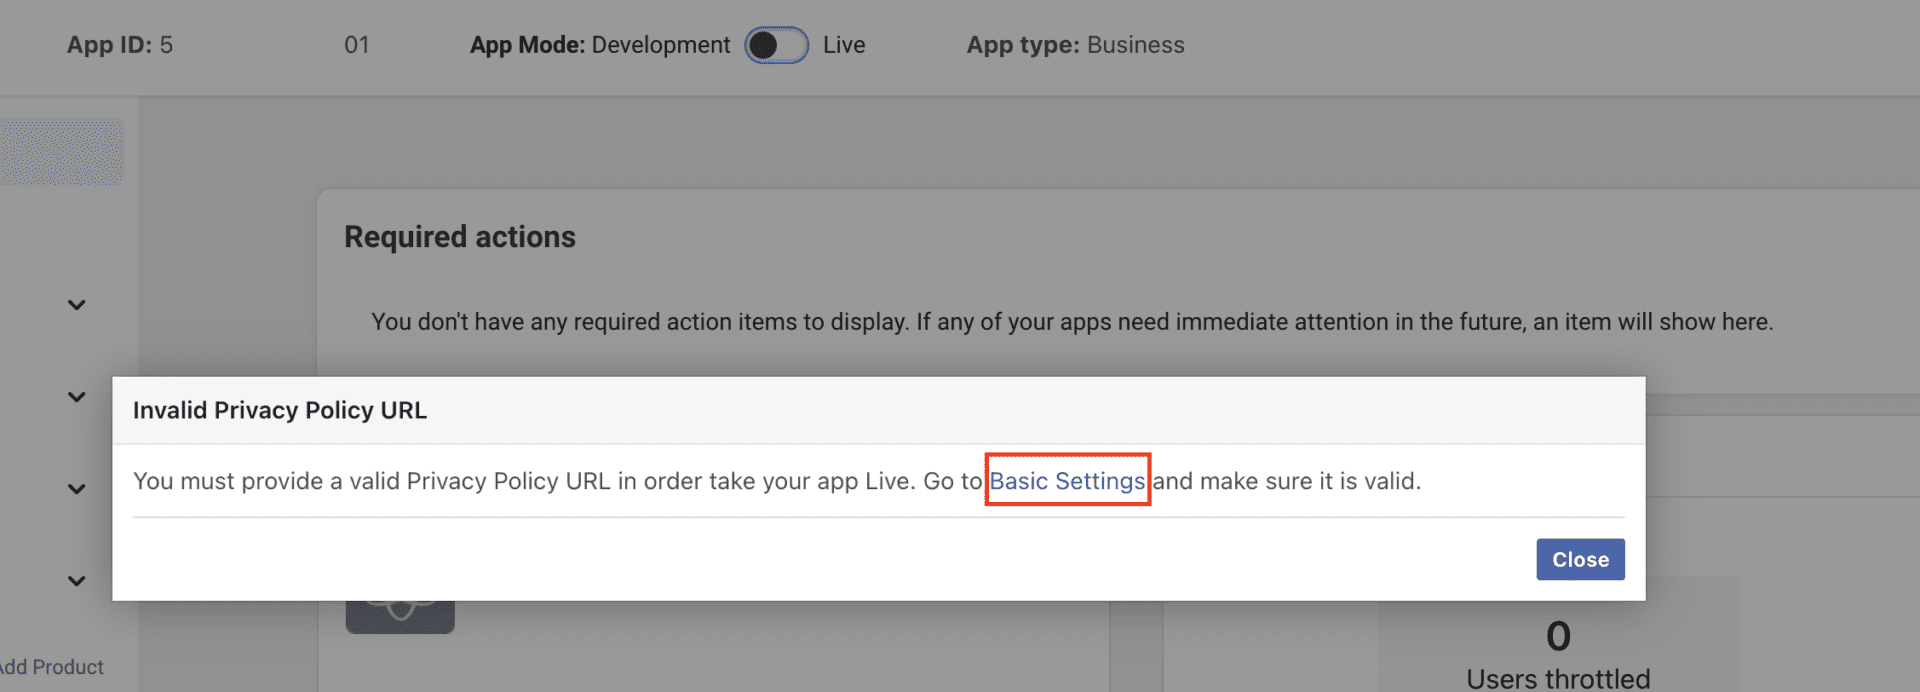
You’ll notice that the App Mode switch at the top of the page is set on Development Mode. You need to change it to Live for the App to work. However, if you attempt to do it, you’ll probably get a warning like the one below. This means that, before going live, you need to provide a valide Privacy Policy.
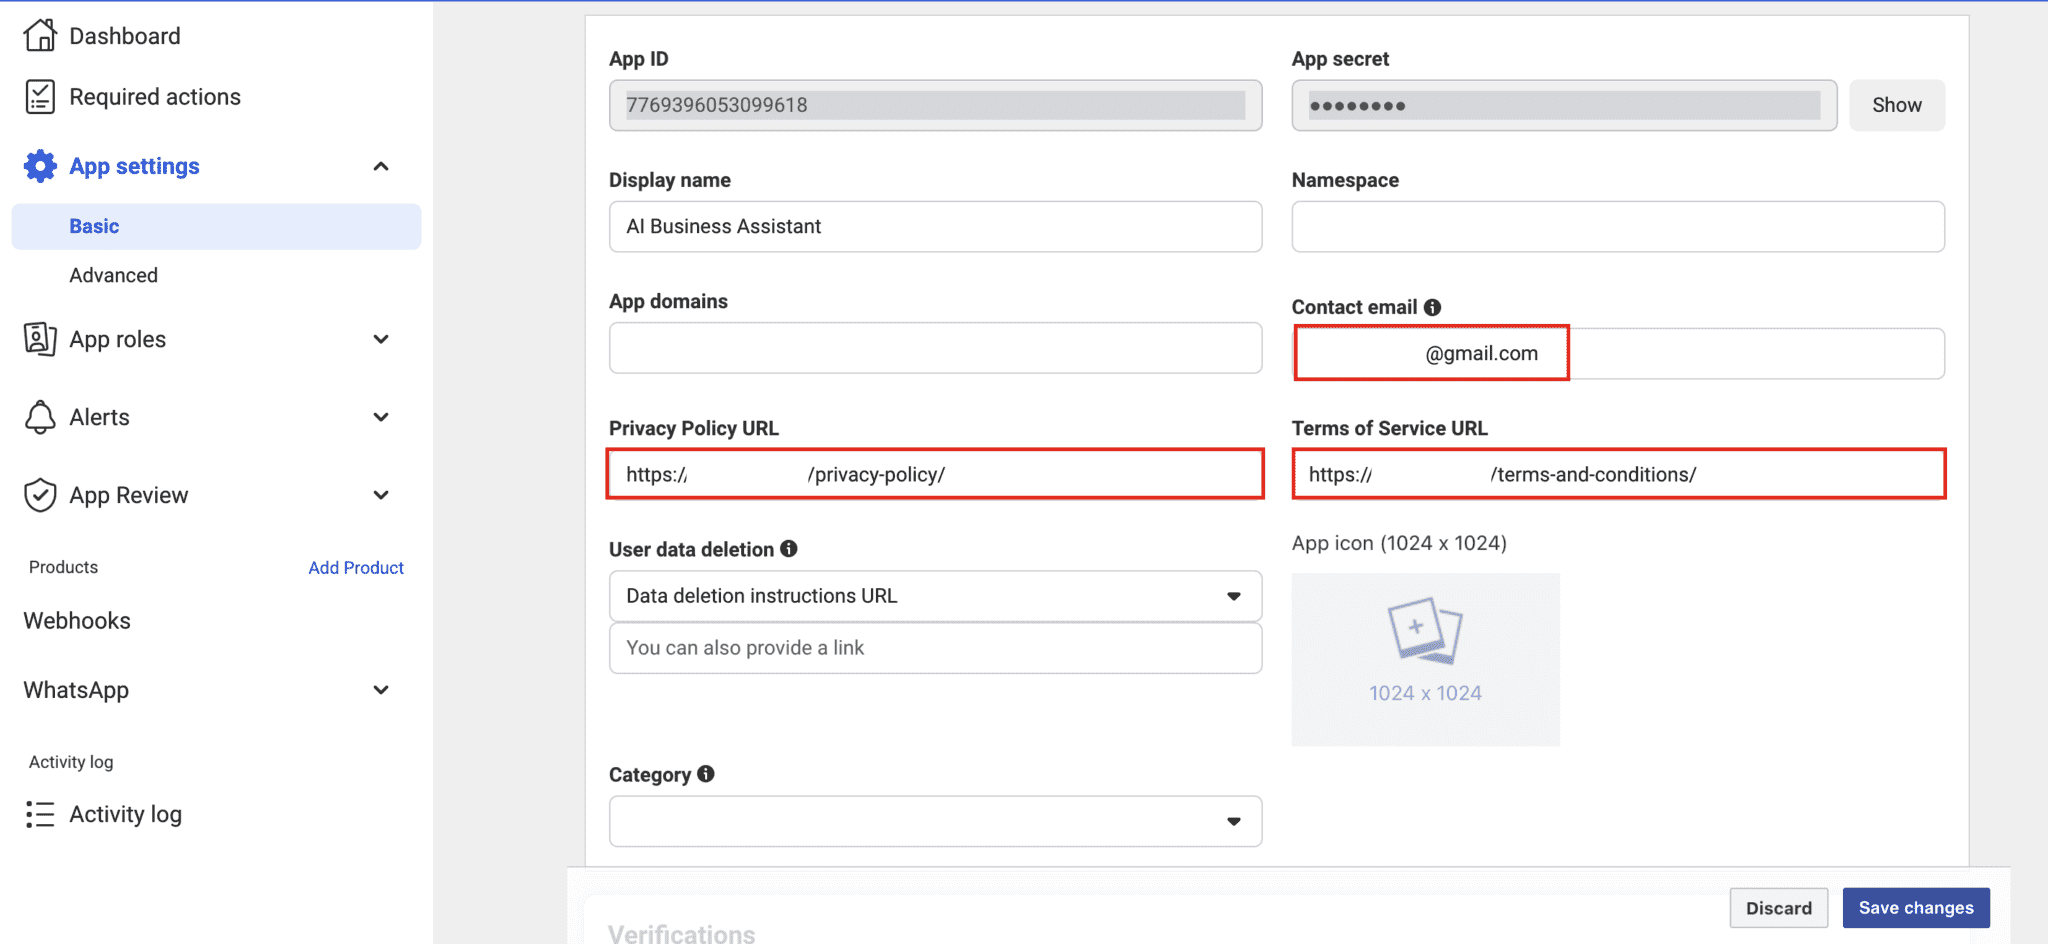
To do it, go to the Apps Basic Settings. You’ll find them on the left sidebar. You need to provide a Privacy Policy URL and a Terms of Service URL. You can use ours. Add a contact email as well, and click on the Save button to apply your changes.
After this, you should be able to turn the switch to Live without further issues.

Enable the token
To get your WhatsApp number approved, you need to enable a second access Token for the app. For this, go back to API Setup and click on the Generate Access Token button.

You will be asked to log into the Facebook Account connected to the Meta Business Account you selected before. Do it, and click on Continue As. On the next page, select Opt in to all current and Future WhatsApp accounts. Once again, click on Continue, and then on Save.

A message confirming that your account has been connected to the app will appear, and you will be able to see an Access Token under API Setup. Leave it there, you will not need this one further.

Finish the connection
Go back to our app. Paste the permanent access token you collected before from the System User. Then, paste the WhatsApp Business Account ID number on the Account ID Field. Click on Submit to save. After a few seconds, your WhatsApp account will be connected and ready to use.
